Meetup Report: Cutie Mark Cookies

Meetup Report: Cutie Mark Cookies

Due to my interest in My Little Pony, particularly the new series My Little Pony: Friendship is Magic, I got it into my head one day that I wanted to make sugar cookies decorated with Cutie Marks. (“Cutie Mark” is the term used by the brand for the symbol on a pony’s flank.) I had seen all sorts of adorable My Little Pony-related crafts, either from one of the message boards I frequent or featured on Equestria Daily, and it made me want to participate as well. I’m not a very craft-oriented person, generally, but I realized that decorated cookies–while certainly not something that would look professional–would be well within my capabilities. Decorating cookies is always more fun to do with a friend, so I invited a friend who likes the series as much as I do for a pony-tastic day in mid-June.

Before decorating cookies, we had lunch at one of my favourite cafés. I’ll take any excuse as a reason to go there, after all~ We enjoyed soup and a few tiny pastries, as usual. When the weather is warmer out, however, one of my favourite things to order at this café is Italian soda or flavoured iced tea. I doubt their soda fountain concoction is really Italian, but it is basically your choice of flavoured syrup combined with sparkling water. I usually opt for cherry, which is my favourite~ ♥

Summer Refreshments
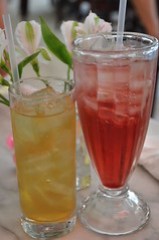
My friend ordered citrus green tea, while I opted for a cherry soda~
We soon headed back and got to work. I had been up baking sugar cookies all morning, to ensure that they’d be cool enough to decorate and to try and let some of the heat dissipate from my home after using the oven. The weather hadn’t yet turned too warm, but things had been warming up. I was concerned that the heat from the oven would make things uncomfortable.

I also ran a few errands to gather decorating supplies. I wanted to keep things fairly simple–I bought tubes of decorating glitter gel. Icing or frosting would have been nice, too, but the gel was easier to use and required less cleanup. (I also really enjoy that it sparkles, obviously.) I had so much fun making these cookies that I’d definitely like to try again sometime, maybe for a party~ The one problem with decorating the cookies was that there were so many that even split between the two of us there were too many. In the days that followed I was eating sugar cookies until they were quite stale, haha~

Cutie Mark Cookies Setup
I set up the table with plates of cooled sugar cookies, the tubes of glitter gel, and we lined up ponies for reference and added cuteness!
We both took the decorating process very seriously, constantly referencing the right shape or placement from one of the ponies on the table, or contemplating the designs on pins. We tried to pay close attention so that we wouldn’t have to try to selectively “erase” icing from the cookies.

Honestly, though, we didn’t try to erase any of them. It worked out alright even if they weren’t perfect. I think I have made an error or two, but I’m pretty sure I just ate the offending cookie and thus removed the evidence entirely.

Cutie Mark Cookies
Even though they’re not perfect, we were both quite proud of the finished cookies!
We chose to do Cutie Marks for each of the six “mane cast” ponies, plus the princesses and a character who only appeared in one episode. The top row contains cookies based on Princess Luna, Princess Celestia, and Trixie. The second row has cookies decorated with the Cutie Marks of Pinkie Pie, Applejack, and Rarity. The bottom row cookies were made in the image of Fluttershy, Rainbow Dash, and Twilight Sparkle.

I enjoyed this so much that now I’d like to do something similar with another theme. Decorating sugar cookies with popular lolita prints, perhaps? Or brand logos and emblems? There are so many themes that would be perfect for this sort of thing. And maybe next time I won’t over-bake some of the cookies, whoops~

Rose-Tinted Living: Cutest Cupcakes

Rose-Tinted Living: Cutest Cupcakes

I have a weakness for cupcakes that has occasionally preceded me. (It can be a bit strange to introduce oneself and hear in response, “Oooooooh, you’re that cupcake girl!” That has happened on more than one occasion.) Although I like to stop at bakeries or cupcake shops, I also enjoy baking at home. My kitchen windowsill stores my cookbooks, half of them cupcake- or tea-related! I own one cookie sheet, but four differently-sized muffin tins; my preferences are pretty clear.

If I host a gathering at my home, I usually bake cupcakes. The last time I hosted we had an assortment of lemon-lavender cupcakes with lemon glaze and honey-chai cupcakes with cream cheese frosting~ Lately I’ve been thinking of Earl Grey cupcakes with violet frosting or fresh strawberry cupcakes layered with whipped cream. Of course, I’ll probably test out my newest acquisition with some funfetti cupcakes (the white kind with multi-coloured sprinkles), as I’ve received several boxes of mix from my mother.

TeaCupCakes
When I spotted the pink box, showing a white teacup filled with a cupcake and topped with pink frosting, that was it. I could not resist.

I spotted these adorable cupcake molds while shopping for thank you notes. I’d spotted these on Fred Flare, but wasn’t swayed enough to buy them online. The TEACUPCAKES are made by Fred & Friends, a company that regularly produces really adorable home goods. They make many, many things I’d love to have in my kitchen!

Although these cupcake molds were easy to resist in pictures online, it was not quite the same when I saw them in the store–especially because there was a display of the cups out of the box, so I could see just how large they were and how completely adorable they are. I wound up coming home with thank you notes, these cupcake molds, and some tea–the “teacupcakes” made the subsequent spotting of dessert-inspired teas impossible to resist.

The TeaCupCake
The creased “folds” of the cup and the swirl at the base of the handle are adorable touches!

The molds are essentially reusable cupcake liners. They appear to be about the size of a standard cupcake, and there are four per box: four baking cups and four display saucers. The plastic saucers cannot go in the oven–they’re for serving only. The silicone teacups are pretty stable, despite being made of a bendy and floppy material, although some of mine seem more oval at the top due to how they were packed in the box. Sitting out has given them time to restore themselves to a more rounded shape.

I’m not usually fond of silicone cupcake molds, but these are so cute I’m more than willing to give them a chance. I’m thinking about making cupcakes soon, although since I’m go out of town before the end of the week it’s probably not best to make too many.

TeaCupCakes
The contents of the box displayed with the box. I love how pink that box is!

The only thing I could ask for is to have more of the molds. Four isn’t really enough–a standard batch of cupcakes typically makes twelve or more. If I wanted to use them for a meetup, it would be unfair to only let four people get the cute cupcakes! However, at the price (roughly $20), it’s not really feasible to buy lots and lots of sets of these at once. Maybe I can try collecting them over time? (I hope they stay in production for a little while…) I’d love to serve these adorable teacupcakes at a tea party!

Honestly, they’re so cute even empty…but they’d be even better with tasty cupcakes~

TeaCupCakes Box
I appreciate the warning not to serve tea in the cupcake molds! It is a little bit tempting…

And, I thought I’d include a cupcake recipe (for the aforementioned honey-chai cupcakes) to round this out:

HONEY-CHAI CUPCAKES WITH HONEY CREAM CHEESE FROSTING

CUPCAKES
Ingredients
Chai (tea bags, loose leaf, or concentrate)
2/3 cup water
1-1/4 cups all-purpose flour
3/4 cup brown sugar
1 tsp baking soda
1/4 tsp salt
1/4 cup honey
4 tbsp unsalted butter, melted
1/4 cup buttermilk
1 large egg

Directions
Preheat the oven to 350F.

Make very strong tea with the chai and the water–either steeping tea/tea bags or mixing the concentrate until you have just 2/3 cup of the liquid. Let it cool to room temperature. (Don’t add sugar and milk! You want it to be just tea. If your concentrate already has sugar and milk you might want to use a different chai.)

Whisk the flour, brown sugar, baking soda, and salt. Combine the honey, melted butter, buttermilk, and egg. Add the liquid ingredients to the dry ingredients and combine–then add the tea and mix until well-blended.

Bake the cupcakes for 18-20 minutes.

FROSTING
Ingredients
12 oz cream cheese
6 tbsp unsalted butter, softened
1/2 tsp vanilla extract
1/2 cup powdered sugar
2 tbs honey
Honeycomb (optional)

Directions
Beat the cream cheese, butter, vanilla, and honey until light and fluffy. Gradually add the powdered sugar until the frosting is a spreadable consistency.

And garnish with honeycomb, if desired~